Using Siggy
The map
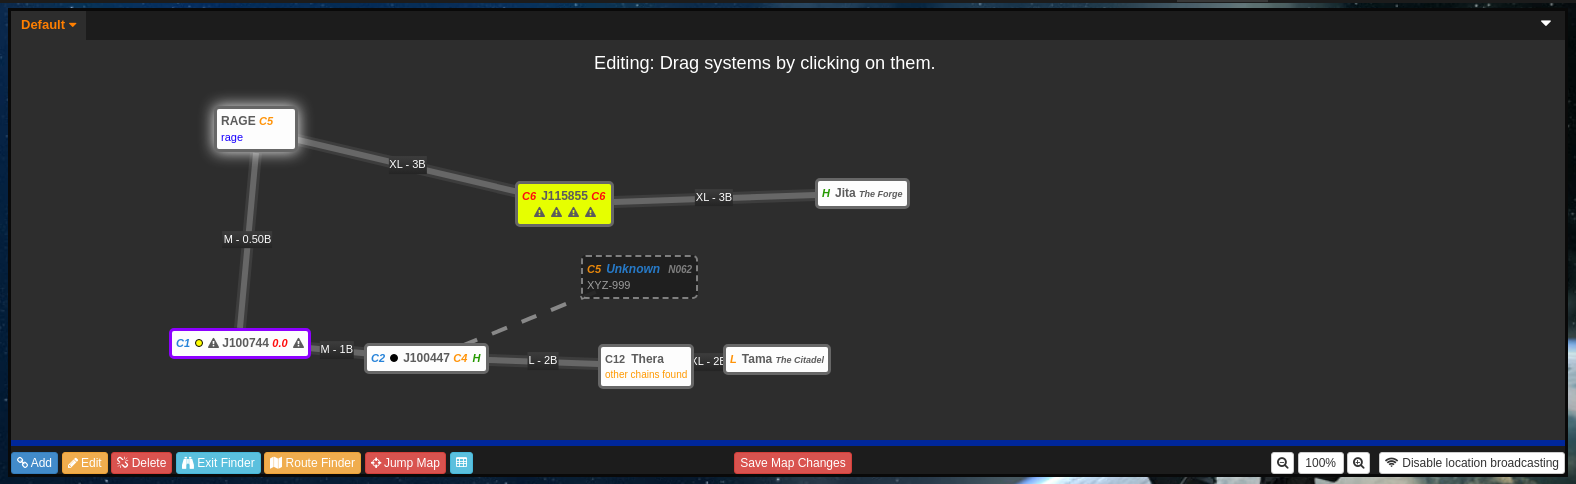
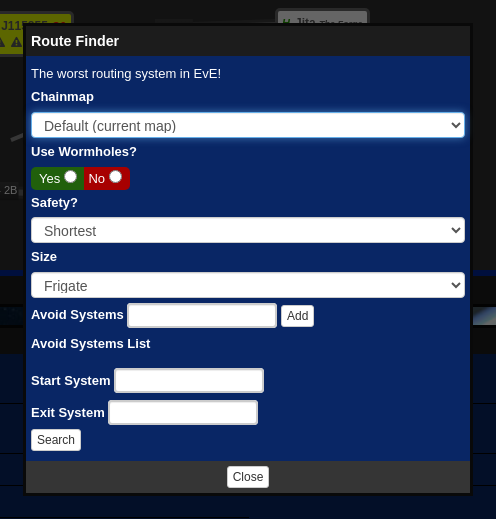
The map is the main feature of Siggy. It shows all the systems in the wormhole chain, and the connections between them. The map is interactive, and you can click on systems to see more information about them, this is loaded in the page below. Each mapped system shows brief information about the system, such as class, statics, effect, name, if it's a rally system, if it has any hazards, and if it's friendly or hostile.
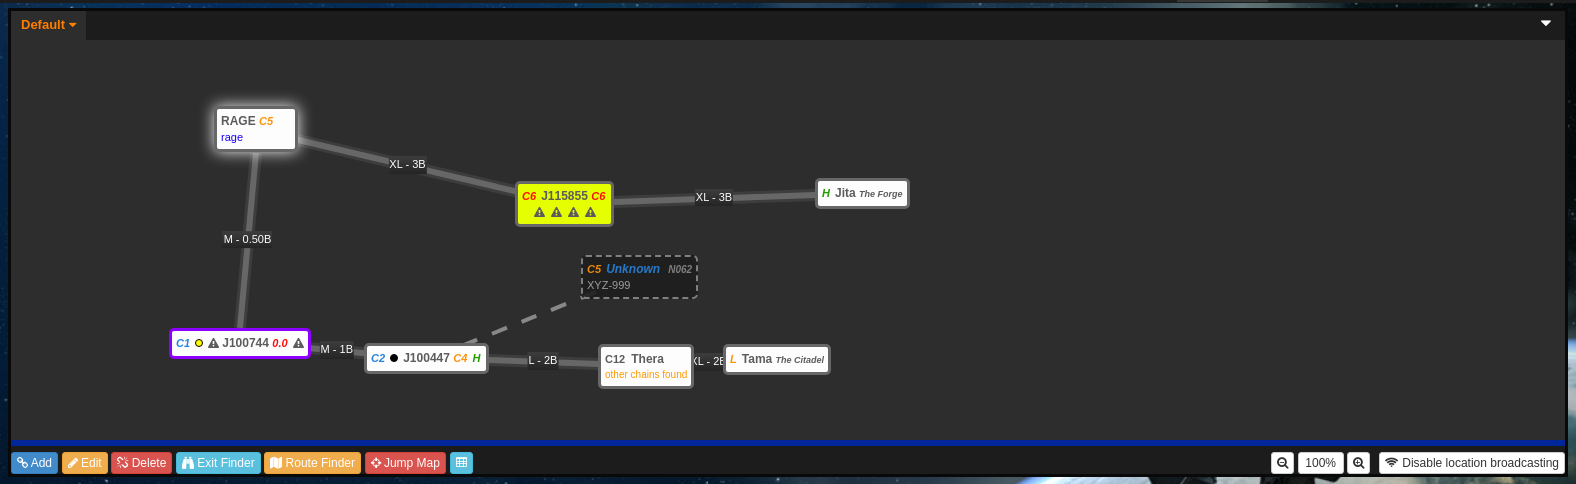
You can move around the map by dragging the empty space, and zoom in and out with the mouse wheel or the zoom buttons in the bottom right corner. Pressing 100% resets the zoom.
How systems look
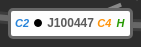
Systems mapped on Siggy are shown in a block which, as said in the previous section, shows brief information about the system. It can be right clicked to perform other actions. Here is a break down of what each part of the system block shows:
System class
The figure on the left side shows the system class, usually C1-C6, H, L, N for high, low and null sec, or others such as C12 for Thera.
System effect
Next to the system class, the system effect is shown as a coloured dot. The colour matches the effect, and hovering over it will show the effect name.
Shattered systems
If the system is shattered, a pie chart icon will be shown next to the system class, similar to the system effect.
System name
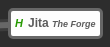
The system name is shown in the middle of the system block, this is usually the name of the system in-game or it will be named how it's called in the chain. Please read the bookmarking and system naming scheme.
If a short note has been added to the system, it is shown underneath the name.
System statics
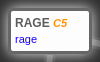
The system statics are shown on the right side of the system block, this shows the class each static leads to. If there are no statics, nothing is shown e.g. in K-space systems.
K-space systems show the region name instead.
System rally
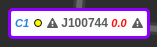
Systems that are used as a rally point are shown with an exclamation mark icon either side of the system name and highlighted in purple.
This is usually used to highlight the route in chain towards the target system.
System hazards
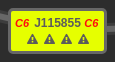
Systems that have hazards are shown with hazard icons at the bottom and the box has its background coloured yellow.
This was originally used for drifters being on the hole, it can now be used for other things such as a hostile fleet being on the hole.
Return and lock
Systems marked as the way back home are shown with a home icon. Locked systems are shown with a padlock icon, a locked system stays on the map even when its connections are removed.
Activity level
The activity level of the system is shown by highlighting the system block in a colour. The colour is based on the reported activity e.g. Empty, Occupied, Hostile, Friendly. The activity level is set when editing the system.
Other chains found
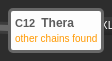
If the same system is mapped on another chainmap, or it's Thera or Turnur with known connections, the system shows other chains found. You can import those connections onto your map, see Import chain.
Unknown jumps
An unknown jump is a wormhole you have scanned down but nobody has jumped through yet. It's shown with a dashed border and a dashed line back to the system it's in, along with the sig ID, the wormhole code and where it leads if known.
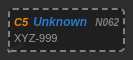
To add one, right click the system the wormhole is in and press Add Unknown Jump.
- Sig ID: The signature ID from your probe scanner e.g. ABC-123
- WH Code: The wormhole type shown when you land on it e.g. C247 or K162
- Destination Class: Where the wormhole leads if you know it
- Mass, End of Life and Frigate sized: The same as for a normal connection
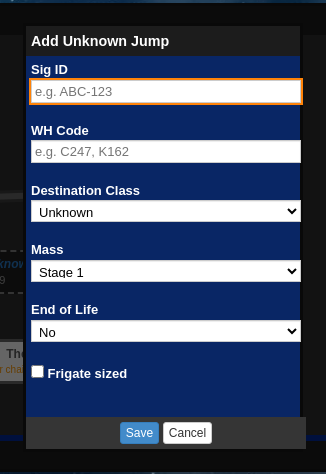
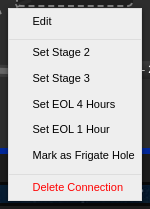
Unknown jumps can be dragged around the map like systems. Right clicking one lets you edit it, change its mass stage or EOL, or delete it.
Map right click menu
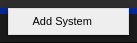
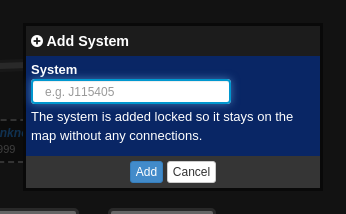
Right clicking on empty space on the map gives you the option to Add System.
This adds a single system to the map without any connections, the system is added locked so it stays on the map. This is useful for marking a target or a staging system before you have a route to it.
System right click menu
Right clicking on a system block will open a menu with options to perform actions on the system. Here is a break down of what each option does:
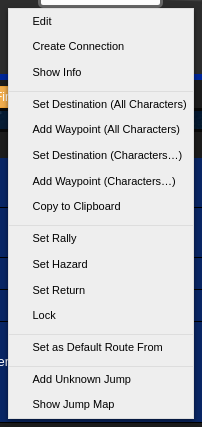
Edit
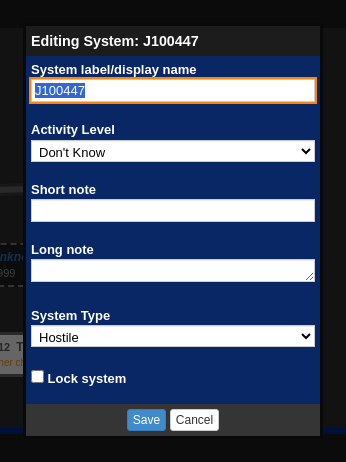
Pressing Edit will open a window where you can edit the system information:
- System label: The display name of the system. The system name should usually follow the bookmark naming scheme.
- Activity Level: How busy the system is, this colours the system block.
- Short note: Shown under the system name on the map.
- Long note: Shown in the system information below the map.
- System Type: e.g. Hostile or Friendly.
- Lock system: Keep the system on the map even without connections.
Create connection
Pressing Create Connection lets you click a second system to link the two together, this opens the same window as the Add button with both systems filled in. Press Escape to cancel.
Show info
Pressing Show info will open a window to dotlan, showing the system information on dotlan.
Set destination and add waypoint
- Set Destination (All Characters) will set the system as your destination in-game on all of your connected characters.
- Add Waypoint (All Characters) will add the system as a waypoint in-game on all of your connected characters, this is useful to create connecting routes if you need to go through multiple k-space systems.
- Set Destination (Characters…) and Add Waypoint (Characters…) let you pick which of your characters to send it to.
Copy to clipboard
Pressing Copy to Clipboard will copy the system name to your clipboard, useful if you need to share the system name with allies.
Set rally / Clear rally
Pressing Set Rally will set the system as a rally point, this will highlight the system in purple and add an exclamation mark icon next to the system name.
Pressing Clear Rally will remove the rally point from the system.
Set hazard / Clear hazard
Pressing Set Hazard will set the system as a hazard, this will highlight the system in yellow and add hazard icons at the bottom of the system block.
Pressing Clear Hazard will remove the hazard from the system.
Set return / Clear return
Pressing Set Return marks the system as part of the way back home, it's shown with a home icon. Pressing Clear Return removes it.
Lock / Unlock
Pressing Lock keeps the system on the map even if all of its connections are removed or expire. Pressing Unlock lets it be cleaned up as normal.
Set as default route from
Pressing Set as Default Route From makes the system the default start system in the Route Finder for this chainmap.
Add unknown jump
Opens the unknown jump window for the system.
Show jump map
Only shown on wormhole and low / null sec systems. Opens the jump map centred on the system.
Import chain
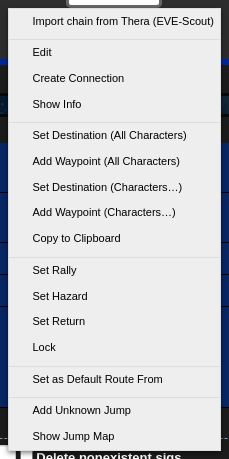
If the system has other chains found, the menu also shows Import chain from with the chainmap or source it was found on, such as Thera from EVE-Scout. Pressing it copies the connections from there onto your map.
Selecting multiple systems
Holding Shift or Ctrl while clicking systems selects more than one. Right clicking one of the selected systems then shows Delete Selected, which removes all of them at once.
Connections
Each connection shows the wormhole size and mass stage as a label, e.g. XL - 3B. The line colour changes for EOL, mass stage and frigate holes so you can see them at a glance.
Connection right click menu
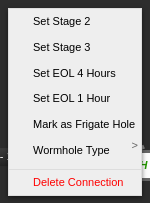
Right clicking a connection lets you quickly change it without opening the edit window:
- Set Stage 1 / 2 / 3: The mass stage of the wormhole
- Set EOL 4 Hours / Set EOL 1 Hour / Clear EOL: Starts or clears the end of life timer
- Mark / Unmark as Frigate Hole
- Wormhole Type: Pick the wormhole type from a list
- Delete Connection
Editing a connection
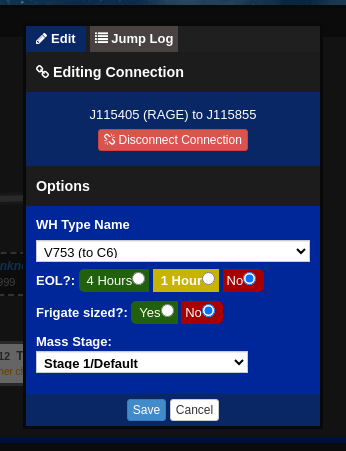
Clicking a connection opens the connection window. From here you can change the wormhole type, EOL, frigate size and mass stage, or disconnect the connection.
Jump log
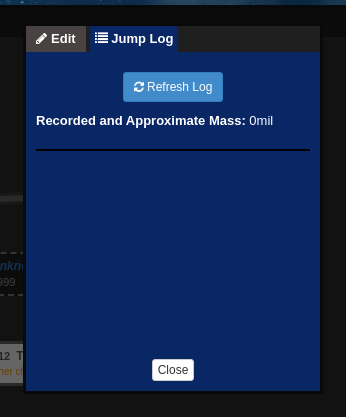
The Jump Log tab in the connection window shows the ships that have been recorded jumping through the wormhole, along with the total recorded and approximate mass. Press Refresh Log to update it.
Map controls
The map has several buttons that allow you to manually add connections, edit the map layout, delete connections, find exits and routes!

Add
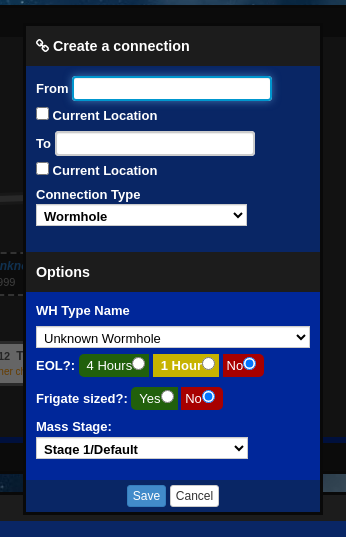
Pressing Add will open a window where you can add a connection between two systems. This is useful if you need to add a connection that wasn't picked up automatically.
- From: Starting system e.g. J115405, or tick Current Location
- To: Ending system e.g. J115855, or tick Current Location
- Connection Type: The type of connection, it's not always wormholes, it could be Cyno, Jump Bridge, or Stargate.
Options for wormholes
- WH Type Name: The name of the wormhole e.g. C008. This will be shown on the map along with what ships can go through it.
- EOL?: Set if the wormhole is end of life or not, it starts a timer which is useful to know when the wormhole will collapse.
- Frigate sized?: Set if the wormhole is frigate size or not, this is useful to know what ships can go through it, similar to mass. It changes the colour of the connection making it easy to see at a glance.
- Mass Stage: Set the mass stage of the wormhole, this is useful to know how much mass is left on the wormhole.
Edit
This will allow you to edit the map layout, you can move systems around. Clicking in the empty space will allow you to drag to select and mass move systems.
Pressing Save Map Changes will save the changes to the map for everyone afterwards.
Delete
Pressing Delete will allow you to delete connections. Click a connection, or click in the empty space and drag to select multiple connections.
Pressing Confirm Mass Delete will delete the selected connections.
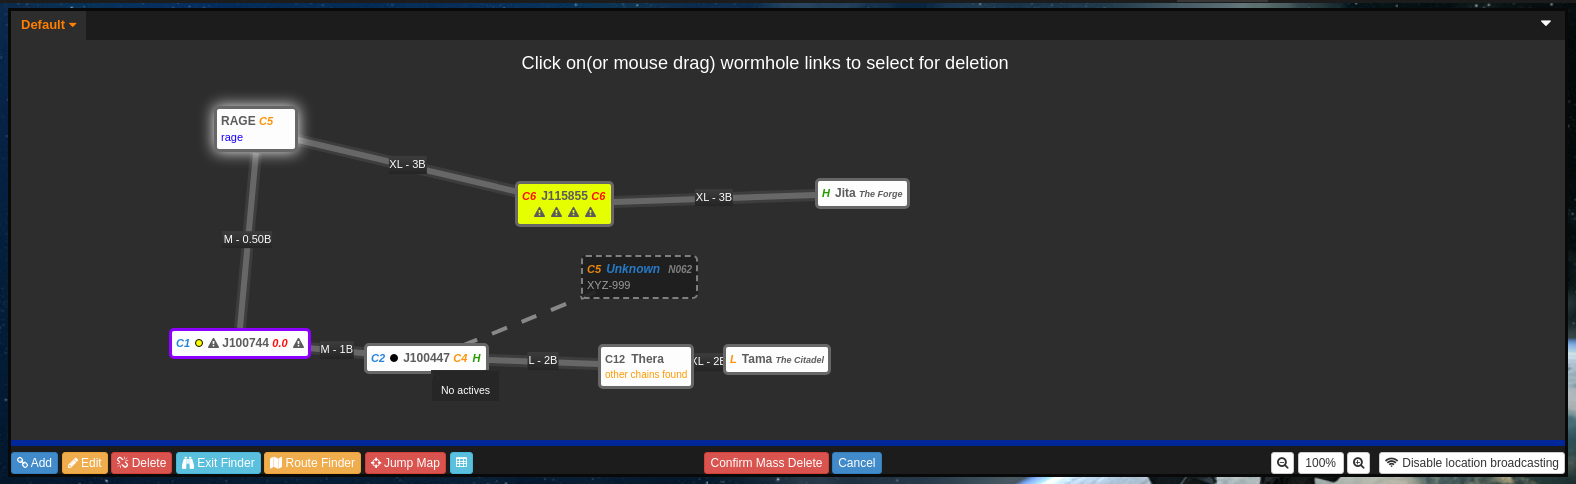
Exit Finder
Pressing Exit Finder will open a window where you can find exits from the current chain closest to the system you state, based on the number of jumps changing depending on safety settings. Exits near my location uses where you currently are in-game.
Safety will attempt to route only using 0.5 or higher security systems.
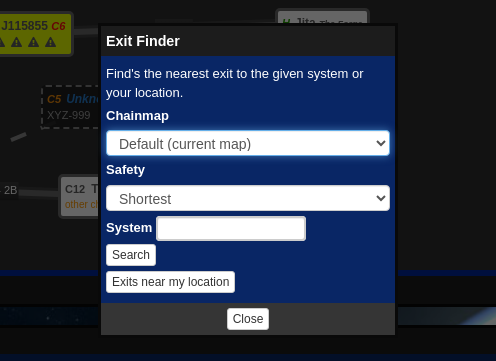
Route Finder
Pressing Route Finder will open a window where you can find a route from a start system to an end system based on the most efficient route.
This is similar to dotlan but with the ability to use mapped wormholes. It will show the route afterwards and the name of the systems, which helps to know what bookmarks to follow.
Options:
- Chainmap: The chainmap to use for the route, you may have more than one chainmap e.g. a farm chain and a main chain.
- Use Wormholes?: Set if you want to use wormholes in the route or not.
- Safety?: Set if you want to route only using 0.5 or higher security systems.
- Size: Set the size of the wormhole you want to use in the route, this is useful if you're looking to move big ships.
- Avoid Systems: Set systems you want to avoid in the route, this is useful if you want to avoid hostile systems such as Tama.
- Start System: The system you want to start from e.g. J115405
- Exit System: The system you want to end at e.g. Berta
Jump Map
Pressing Jump Map opens the jump map for blops and capitals, this is covered in The jump map.
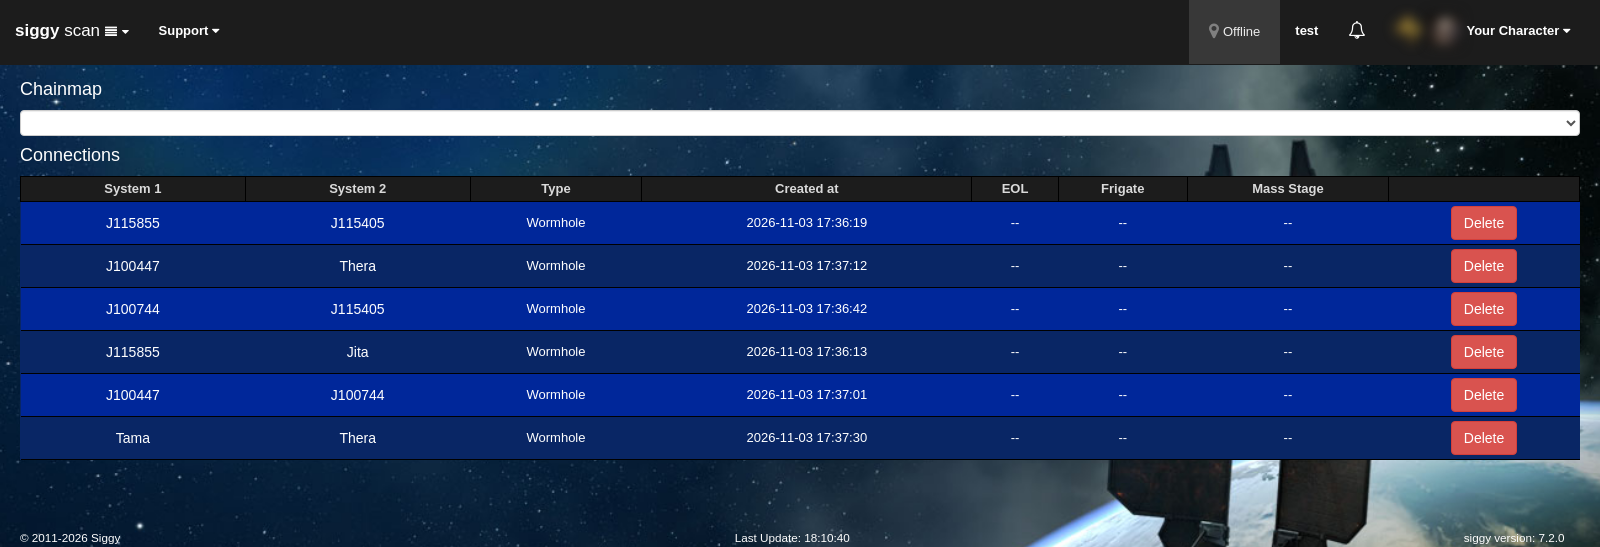
Table view
The blue table button switches to a list of every connection on the chainmap, with its type, when it was created, EOL, frigate size and mass stage. This is useful for checking a big chain at a glance, and connections can be deleted from here too.
Location broadcasting
Hovering over a system shows the pilots currently in it. Disable location broadcasting stops your character showing in that list, press it again to turn it back on. Some groups always broadcast, in which case the button has no effect.
Chainmaps
Chainmaps are a way to have multiple maps in Siggy, you can change the chainmap you're viewing by selecting the chainmap in the top left corner of the map.
Mapping under a different chainmap in the same group will allow mass to be recorded across the chainmaps, this is useful if you have found dreads to gank from your farm chain and don't want to overmass.
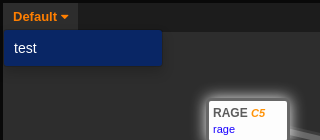
If you own a chainmap you can change its settings and who can see it, see Managing your maps.